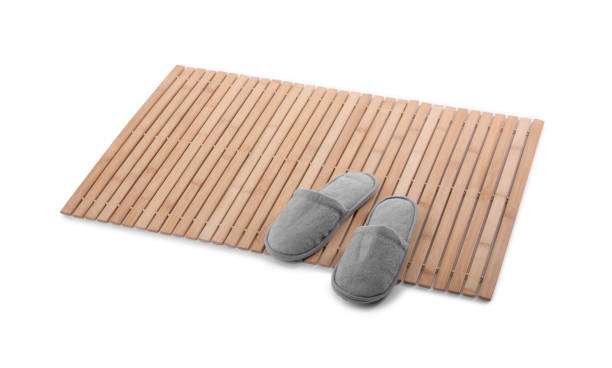
Your bath mat ? 6 scientific steps to completely remove them in one go.
In modern family bathrooms, bath mats are almost an essential household item. They not only provide a comfortable feel underfoot but also prevent slipping in the damp bathroom environment, which is especially important for the elderly and children, as the anti-slip and comfort properties of bath mats are directly related to family safety. However, the high humidity and warm environment of the bathroom also make bath mats a breeding ground for mold. Many families encounter the problem of recurring mold spots when using bath mats .
Even after each cleaning, mold spots soon reappear on the suction cups, edges, and grooves. Mold spots not only affect aesthetics but may also release mold spores, posing a potential threat to respiratory and skin health, especially for children, the elderly, or people with asthma or allergies.
The recurring appearance of mold spots is related to both the high humidity and poor ventilation in the bathroom, as well as the inherent properties of the material and daily usage habits. Many families habitually clean mold spots by simply rinsing or wiping, but this is often only surface cleaning and cannot completely kill the mold spores hidden in the material’s grooves, suction cups, and corners. Over time, the mold multiplies again, and the mold spots reappear, creating a vicious cycle. Without mastering scientific methods, even purchasing an expensive bathroom mat will hardly solve the mold problem completely.
This article will explain the formation mechanism and prevention strategies of mold spots from a scientific perspective, combined with the daily use environment and material characteristics of the home. It will propose six scientific steps to help consumers completely remove mold spots in one go, and provide daily maintenance methods to extend the service life of the bath mat and ensure both comfort and safety.
The scientific principle of mold formation
on bath mats is not accidental; it is the result of a combination of environmental conditions, material properties, and usage habits. Mold belongs to a type of fungus that multiplies extremely rapidly in hot, humid, and nutrient-rich environments. Bathrooms, with their constant moisture and the residue of skin flakes, soap, and sweat from washing, provide ideal conditions for mold growth.
The tiny grooves, textures, and suction cup areas on the material’s surface become breeding grounds for mold spores. Once mold spores attach to these areas, if they are not thoroughly cleaned, they will rapidly multiply in the humid environment, forming visible mold spots. These spots are often black, green, or white filaments, distributed along the edges of suction cups, in folded corners, and within the grooves of flat textures.
Besides humidity and nutrient conditions, washing and drying methods directly affect the rate of mold growth. Improper washing methods, such as using hot water or strong chemicals, can damage the surface structure of the material, increasing the number of tiny grooves and providing more space for mold to attach. Incomplete drying, folding corners, or stacking bath mats can also cause persistently high local humidity, allowing mold to regrow quickly. Material aging is also an important factor. Silicone, PVC, and rubber gradually harden over time due to moisture, temperature, and chemical substances, increasing the number of microcracks on the surface and creating conditions for mold attachment and spread.
Therefore, to completely remove mold spots from bath mats , a scientific and systematic approach must be taken, addressing environmental control, material properties, cleaning methods, and drying, rather than simply wiping the surface.
Step 1: Partial processing, starting with local areas and then moving to the whole.
The first step to thoroughly removing mold is to treat specific areas. Bath mats typically consist of corners, suction cup areas, and textured surfaces, each with varying mold distribution and cleaning difficulty. Directly cleaning the entire mat may result in incomplete removal of mold in certain areas, so it is recommended to treat specific areas first.
The procedure involves laying the bath mat flat in a well-ventilated area. First, rinse off surface dust and dander with warm water. Then, for areas with severe mold, spray a mild disinfectant or diluted white vinegar to inhibit mold growth. The advantage of this zoned approach is that it allows for targeted cleaning of severely affected areas, avoids wasting disinfectant, and ensures that mold in each area is effectively treated.
During the zoning process, special attention should be paid to the suction cup area, corner folds, and textured grooves, as these areas are often high-risk spots for mold hiding and recurrence. After localized treatment, a thorough overall cleaning can ensure that mold spots are completely removed.
Step 2: Soak to soften mold spots
Mold spots often penetrate deep into the grooves of the material or the crevices of suction cups, making them difficult to remove completely with simple wiping. Therefore, the second step is to soak and soften the mold. Soaking in warm water for 10 to 20 minutes can soften the mold spots, loosen the attached dirt and dander, and make subsequent scrubbing more thorough. It is recommended to keep the water temperature between 30 and 40 degrees Celsius to avoid damaging the material’s softness with high temperatures.
During the soaking process, gently shake the bath mat to allow water to seep into the suction cups and textured grooves, bringing to the surface any hidden mold spots. For silicone materials, the soaking time can be slightly longer because silicone is water-resistant and drains quickly; for PVC materials, the soaking time should not be too long to avoid deformation of the edges and corners; rubber materials are highly absorbent, so care should be taken to apply pressure evenly to prevent localized expansion and contraction.
Soaking softens the material, breaking down the environment in which mold adheres and loosening the dirt on the surface and in the grooves, preparing it for the next step of deep scrubbing, which is an important step in thoroughly removing mold spots.
Step 3: Gently scrub to ensure deep cleaning.
After soaking and softening, a gentle scrubbing is required. Use a soft-bristled brush or sponge to gently brush along the texture of the bath mat and the grooves of the suction cups to thoroughly remove mold and residual soap scum. When scrubbing, be careful to apply even pressure and avoid scratching the surface of the material or damaging the suction cup structure.
For raised edges or grooves at the bottom of suction cups, use a small brush, such as a toothbrush, for deep cleaning to ensure no mold spores remain. This step is crucial to prevent mold recurrence, as mold often hides inside hard-to-clean grooves, and surface wiping cannot achieve a deep clean. After brushing, rinse thoroughly with water to ensure all cleaning or disinfectant is completely removed, avoiding chemical residue that could affect skin contact or the softness of the material.
Deep cleaning not only removes mold spots, but also maintains the softness of the material and the anti-slip properties of the suction cups, which is an important step in maintaining the long-term comfort and safety of bath mats .
Step 4: Disinfect and sterilize to prevent mold recurrence.
Cleaning and scrubbing are only physical methods to remove mold spots. To prevent mold spores from remaining, chemical disinfection is necessary. You can choose a mild disinfectant, diluted white vinegar, or baking soda solution for soaking or spraying. The acetic acid in white vinegar can inhibit mold growth, while baking soda can neutralize residual acidic substances on the surface of the bath mat , reducing the suitability of the environment for mold growth.
When disinfecting, pay attention to the dosage and concentration to ensure environmental safety, especially in households with children or the elderly. After disinfection, thoroughly rinse the bath mat with clean water to avoid residue affecting skin health. This step effectively destroys mold spores, preventing their regeneration and laying the foundation for thorough mold prevention.
Step 5: Dry thoroughly to eliminate conditions that allow moisture to grow.
After cleaning and disinfection, thorough drying is key to preventing mold recurrence. Bath mats should be laid flat or hung in a well-ventilated area to air dry naturally or at a low temperature. When hanging, allow the edges to hang down naturally to avoid curling or folding, ensuring even evaporation of moisture. When laying flat, choose a level surface and ensure the bathroom is well-ventilated to reduce moisture retention.
In high-humidity environments, use an exhaust fan or dehumidifier to speed up the drying process and reduce the chance of mold spores multiplying. Thorough drying not only prevents mold but also maintains the softness and slip resistance of the bath mat , extending its lifespan.
Step Six: Routine maintenance to prevent mold regrowth
Thoroughly removing mold is only the first step; long-term maintenance is key to preventing recurrence. After each use, rinse the bath mat surface promptly to remove soap and stains, and gently shake off excess water. Keep the bathroom well-ventilated and regularly inspect corners and suction cup areas; treat any minor mold spots immediately.
bath mats that are not used for extended periods , periodically soak them in warm water and gently brush them to prevent dirt buildup on the material and texture. Choosing breathable, well-draining, and easy-to-dry materials, such as silicone, can speed up drying and reduce the risk of mold growth. Good daily maintenance not only slows down material aging but also maintains a soft feel and anti-slip properties, ensuring home safety.
Comprehensive Recommendations
Through the six scientific steps outlined above, mold spots on bath mats can be completely removed in one go, effectively preventing recurrence. The process—zoned treatment, soaking and softening, gentle scrubbing, disinfection, thorough drying, and daily maintenance—constitutes a complete anti-mold system. Proper use and maintenance of bath mats not only improves cleaning efficiency and user comfort but also extends the material’s lifespan and reduces family health risks. In humid environments, maintaining ventilation, choosing suitable materials, and developing good cleaning habits are fundamental guarantees for the long-term safe use of bath mats .
FAQ
Question 1: How long after cleaning mold spots from a bath mat is it likely to recur?
If daily maintenance is improper or the bathroom humidity is too high, mold spots may recur within one to two weeks. Therefore, after thorough cleaning, it should be kept well-ventilated and dry, and rinsed and air-dried regularly.
Question 2: Can hot water or bleach be used to remove mold spots?
It is not recommended to use high temperatures or strong bleach, as this will damage the bath mat material, causing it to harden or deform. Warm water and a mild disinfectant should be used to protect the material while killing bacteria.
Question 3: Are there different cleaning methods for different bath mat materials?
Yes. Silicone bath mats drain quickly and are soft, so they can be soaked for a long time; PVC bath mats are easily deformed, so soaking time should be controlled; rubber bath mats are elastic but easily absorb water, so be sure to dry them thoroughly. Adjust the soaking and scrubbing methods according to the material to ensure thorough cleaning without damaging the bath mat .